-40%
Portable balancer "Balanset-1A" for dynamic balancing
$ 908.68
- Description
- Size Guide
Description
Portable field balancer "Balanset-1A"1. Introduction
Balanset-1A is portable dynamic balancer used to balance rigid rotors in their own bearings (in-situ) or as measuring system in the balancing machines. It provide single- and two-plane dynamic balancing services for fans, grinding wheels, spindles, crushers, pumps and other rotating machinery. Balancing software provides the correct balancing solution for single-plane and two-plane balancing automatically.
Balanset-1A is simple to use for non-vibration experts.
Balancing procedure uses 3-run method with adding the test mass in every place of balancing (Influence Coefficient Method). Software calculate balancing weghts and place (angle) automatically, show it in the result table and save in archive file. Also you can print balancing report. Waveform and spectrum of vibration charts are possible.
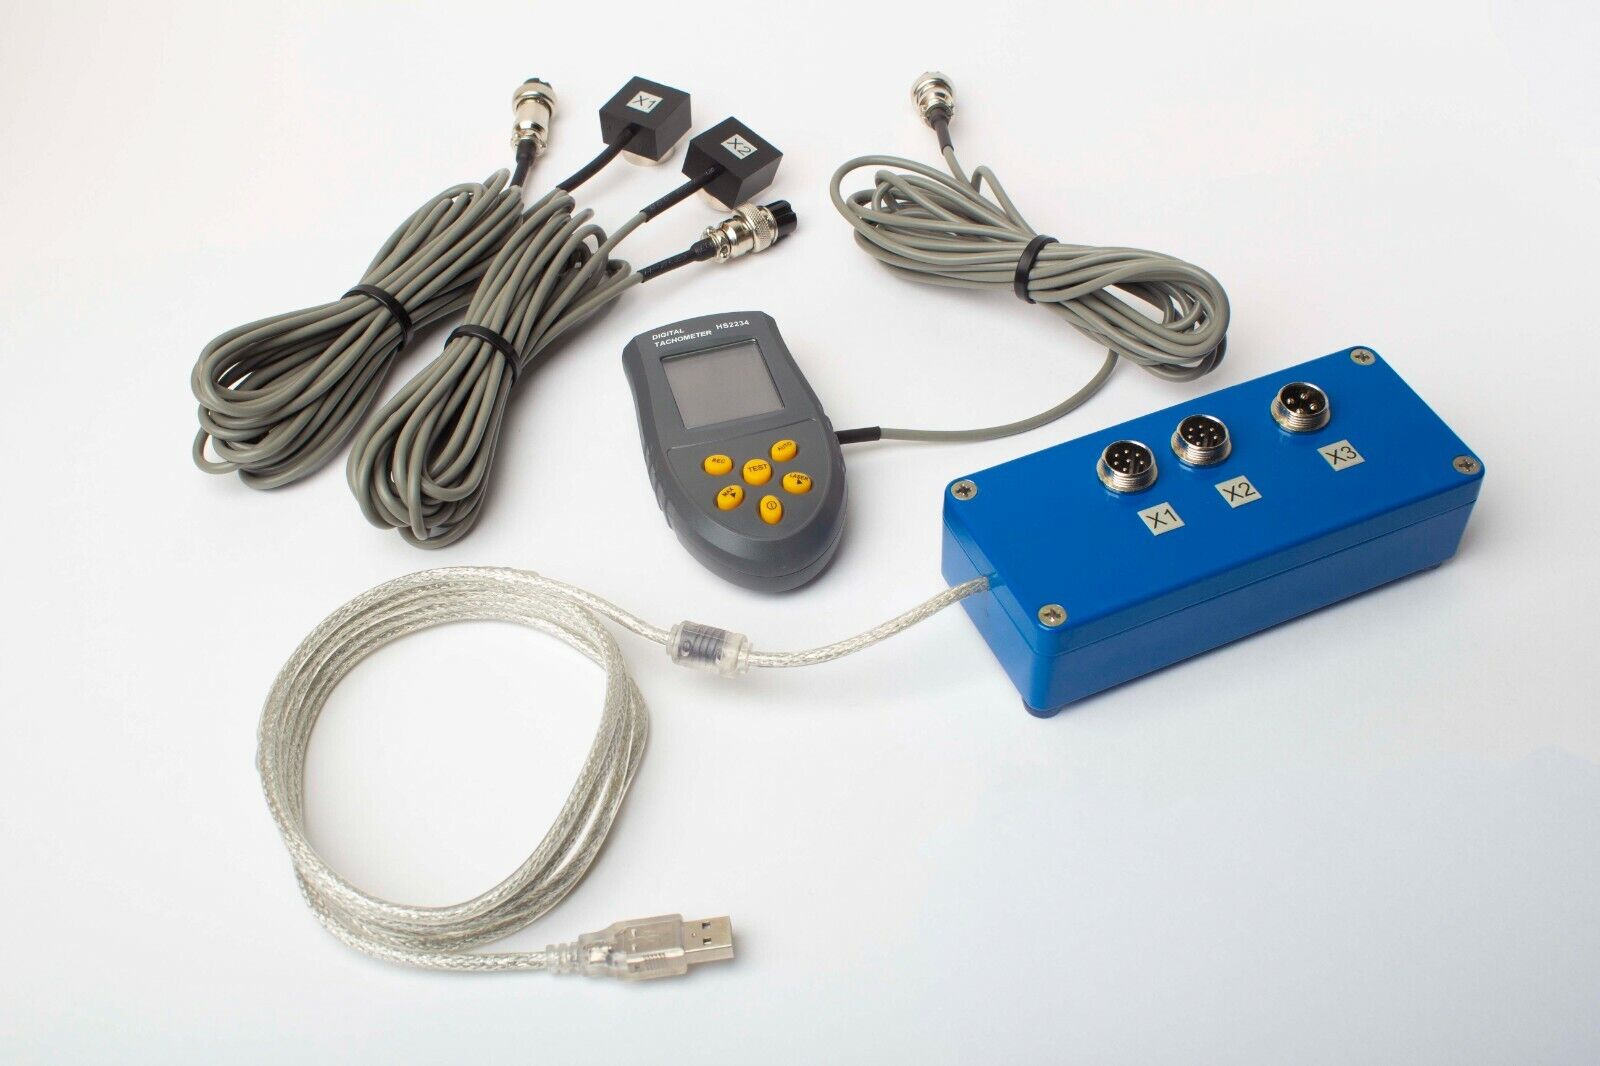
Balanset-1A includes:
1 - Interface unit
2 - two vibration sensors
3 - optical sensor (laser tachometer)+ magnetic stand
4 - scale
5 - Software ( notebook not included - supplied by additional order)
6 - plastic case for transportation
Specifications:
2x vibration sensors (vibro accelerometers, cable length 4m, 10m optionally).
1 x optical sensor (laser tachometer, distance: 50 to 500mm, cable length 4m, 10m optionally)
1 x USB interface module with software for PC connection
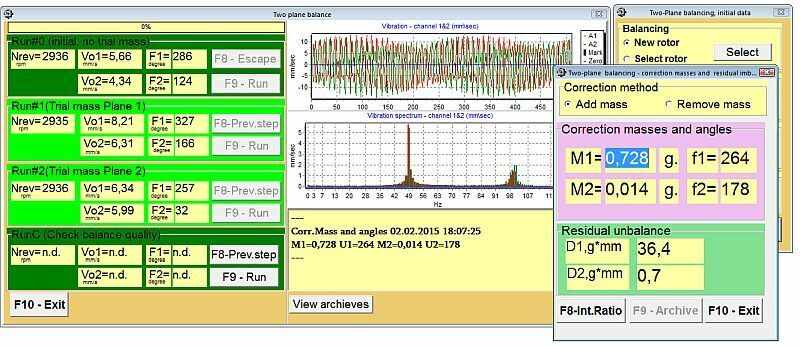
Software provides measuring vibration, phase angle, calculation of value and angle of correcting mass.
Details:
Amplitude vibration range 0.05-100 mm/sec
Vibration frequency range 5 - 300 Hz
Accuracy - 5% of full scale
Correction planes 1 or 2
Rotation speed measuring 150-60000 rpm
Phase angle measurement accuracy +-1 degree
Power - 140- 220VAC 50Hz
Weigh - 4 KG
2. Prepare to work. Software and hardware setup for two-plane balancing.
2.1 Driver installation
Install drivers and Balanset-1A software from installation flash disk.
Insert USB cable to computer USB port. Interface module supplied from USB port.
Use
shortcut to run the program.
2.2 Sensor installation
Install sensors as shown on the fig. 1,2,3
Connect cables
- vibration sensors to connectors X1 and X2
- phase laser sensor to connector X3
fig.1 Two-plane balancing scheme
Install reflector mark on the rotor and check RPM value on the phase sensor when rotor rotate.
fig.2 Phase sensor settings
3. Balancing procedure
fig.3 Main window for two-plane balancing
After sensors install click on "F7 - Balancing" button and set balancing parameters. Then click "F9-Next"
fig.4 Balansing settings
Then make step-by-step operations as shown in the Table 1 below.
Table 1. Step-by-step operations
Run 0 - Start-up without test weight.
2. Run the machine at its operating speed (be sure that operating speed is far from resonance frequency of construction)
3. Click on F9-Start and measure the vibration level and phase angle in turn without test weight.
Duration of the measuring process may amounts 2-10 sec.
fig.7 Two plane balancing window. Original vibration
Run 1 - Test weight in plane 1
4. Stop the machine and mount a test weight of suitable size arbitrarily in plane 1.
5. Start up the machine, click on
F9-Run
and measure the new vibration level and phase angle. Duration of the measuring process may amounts 2-10 sec.
6. Stop the machine and
remove the test weight
fig.8 Two plane balancing. Vibration after balancing
Run 2 - Test weight in plane 2
7. Mount a trial weight of suitable size in plane 2 .
8. Start the machine again, click on
F9-Run
and measure the vibration level and phase angle once more.
9. Stop the machine and
remove the test weight
fig.9 Two plane balancing. Vibration after trim balancing
Step 4 - Calculation
10. The values of the correction weights and angles required will be calculated automatically and shown in popup form.
fig.5 Two plane balancing. Correction weights calculation
fig.6 Two plane balancing. Correction weight mounting
RunC
11. Mount the correction (balance) weights at the positions indicated in popup form at the same radius as the test (trial) weights (as shown in the figure in right column).
12. Start up the machine again and measure the amount of residual unbalance in the rotor , to see how successful the balancing job has been .
After balancing you can save influence coefficient balancing (F8- coefficients) and other information (F9- Add to archive) and use it later. (see 4.3, 4.4)
Balancing procedure - video.
Field balancing
4. Other features
4.1 Vibrometer mode.
To select Vibrometer mode click "F5- Vibrometer" button in the main window for two-(one-) plane balancing
To start the measuring process click "F9-Run"
V1s (V2s) - summary vibration in plane 1(2) (mean-square) V1o (V2o) - vibration in plane 1(2) (first "revolution" harmonic value) In the right side you can see spectrum window.
Measuring data files can be saved in archive.
4.2 Influence coefficients
If you save the results of previous balance runs, you can eliminate the test weight run and balance the machine using its saved coefficients. Select "Secondary" in the "Type of balancing" window and click "F2 Select" button to choose previous machine type from list.
To save coefficients after balancing click "F8-coefficients" in the balancing result pop-up window (see Tab.1) and then click "F9-Save" button. Input machine type ("Name") and other information in the table.
4.3 Archives and reports.
To save balancing information click"F9- Add" to archive in the balancing result pop-up window (see Tab.1). Input machine type ("Name") and other information in the table.
To open previous saved archives click "F6-Report" in the main window.
To print report click "F9-Report"
Two planes balancing archive.
4.4 Charts
To view charts of vibration click on "F8-Diagrams"
Three kinds of charts are available "Common vibration","Vibration on rotor revolution frequency 1x vibration" and "Spectrum" (for example, for 3000 rev\min frequency is equal 50Hz)
Common vibration chart
1x vibration chart.
Vibration spectrum charts.
